Replacing an Autolite 1100 single-barrel carburetor with a Holley 1904 on a Ford 200 ci I6 - Part 2
You can read some of the background on why I’m doing this swap on the previous post.
Summary
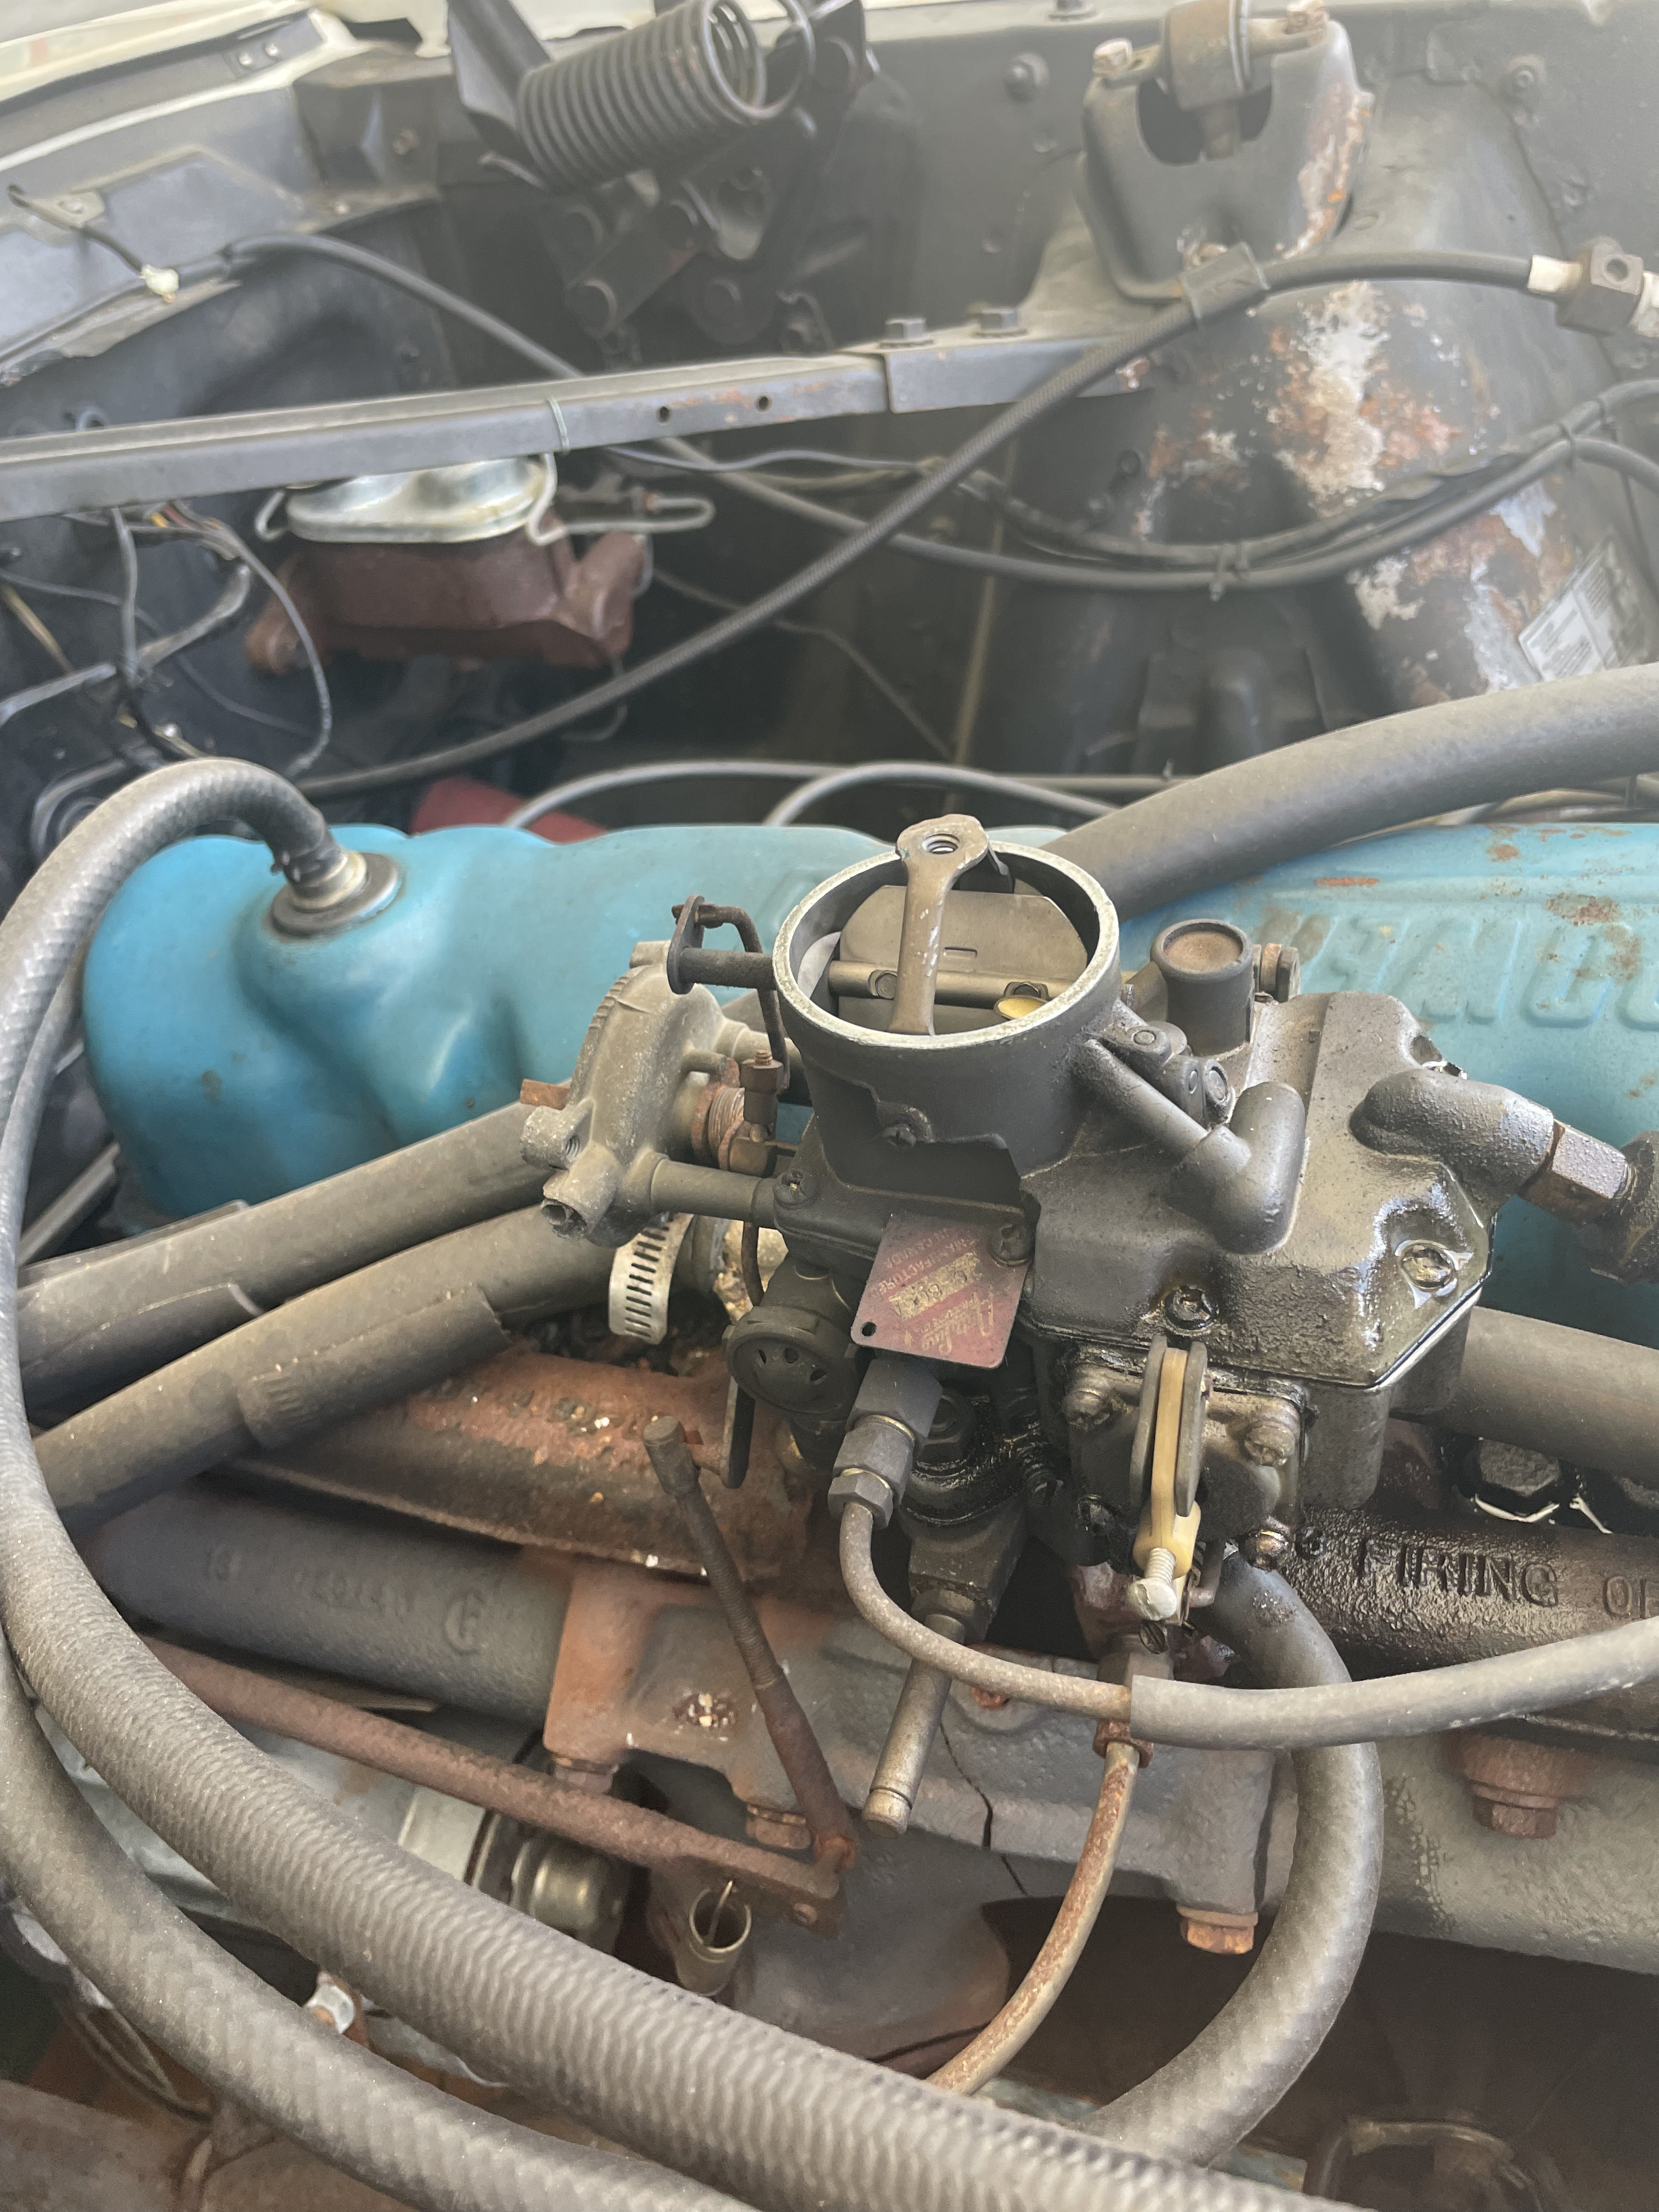
The Autolite 1100 carb that came on this engine originally has a lot of problems, and I will be replacing it with a Holley 1904.
Comparison
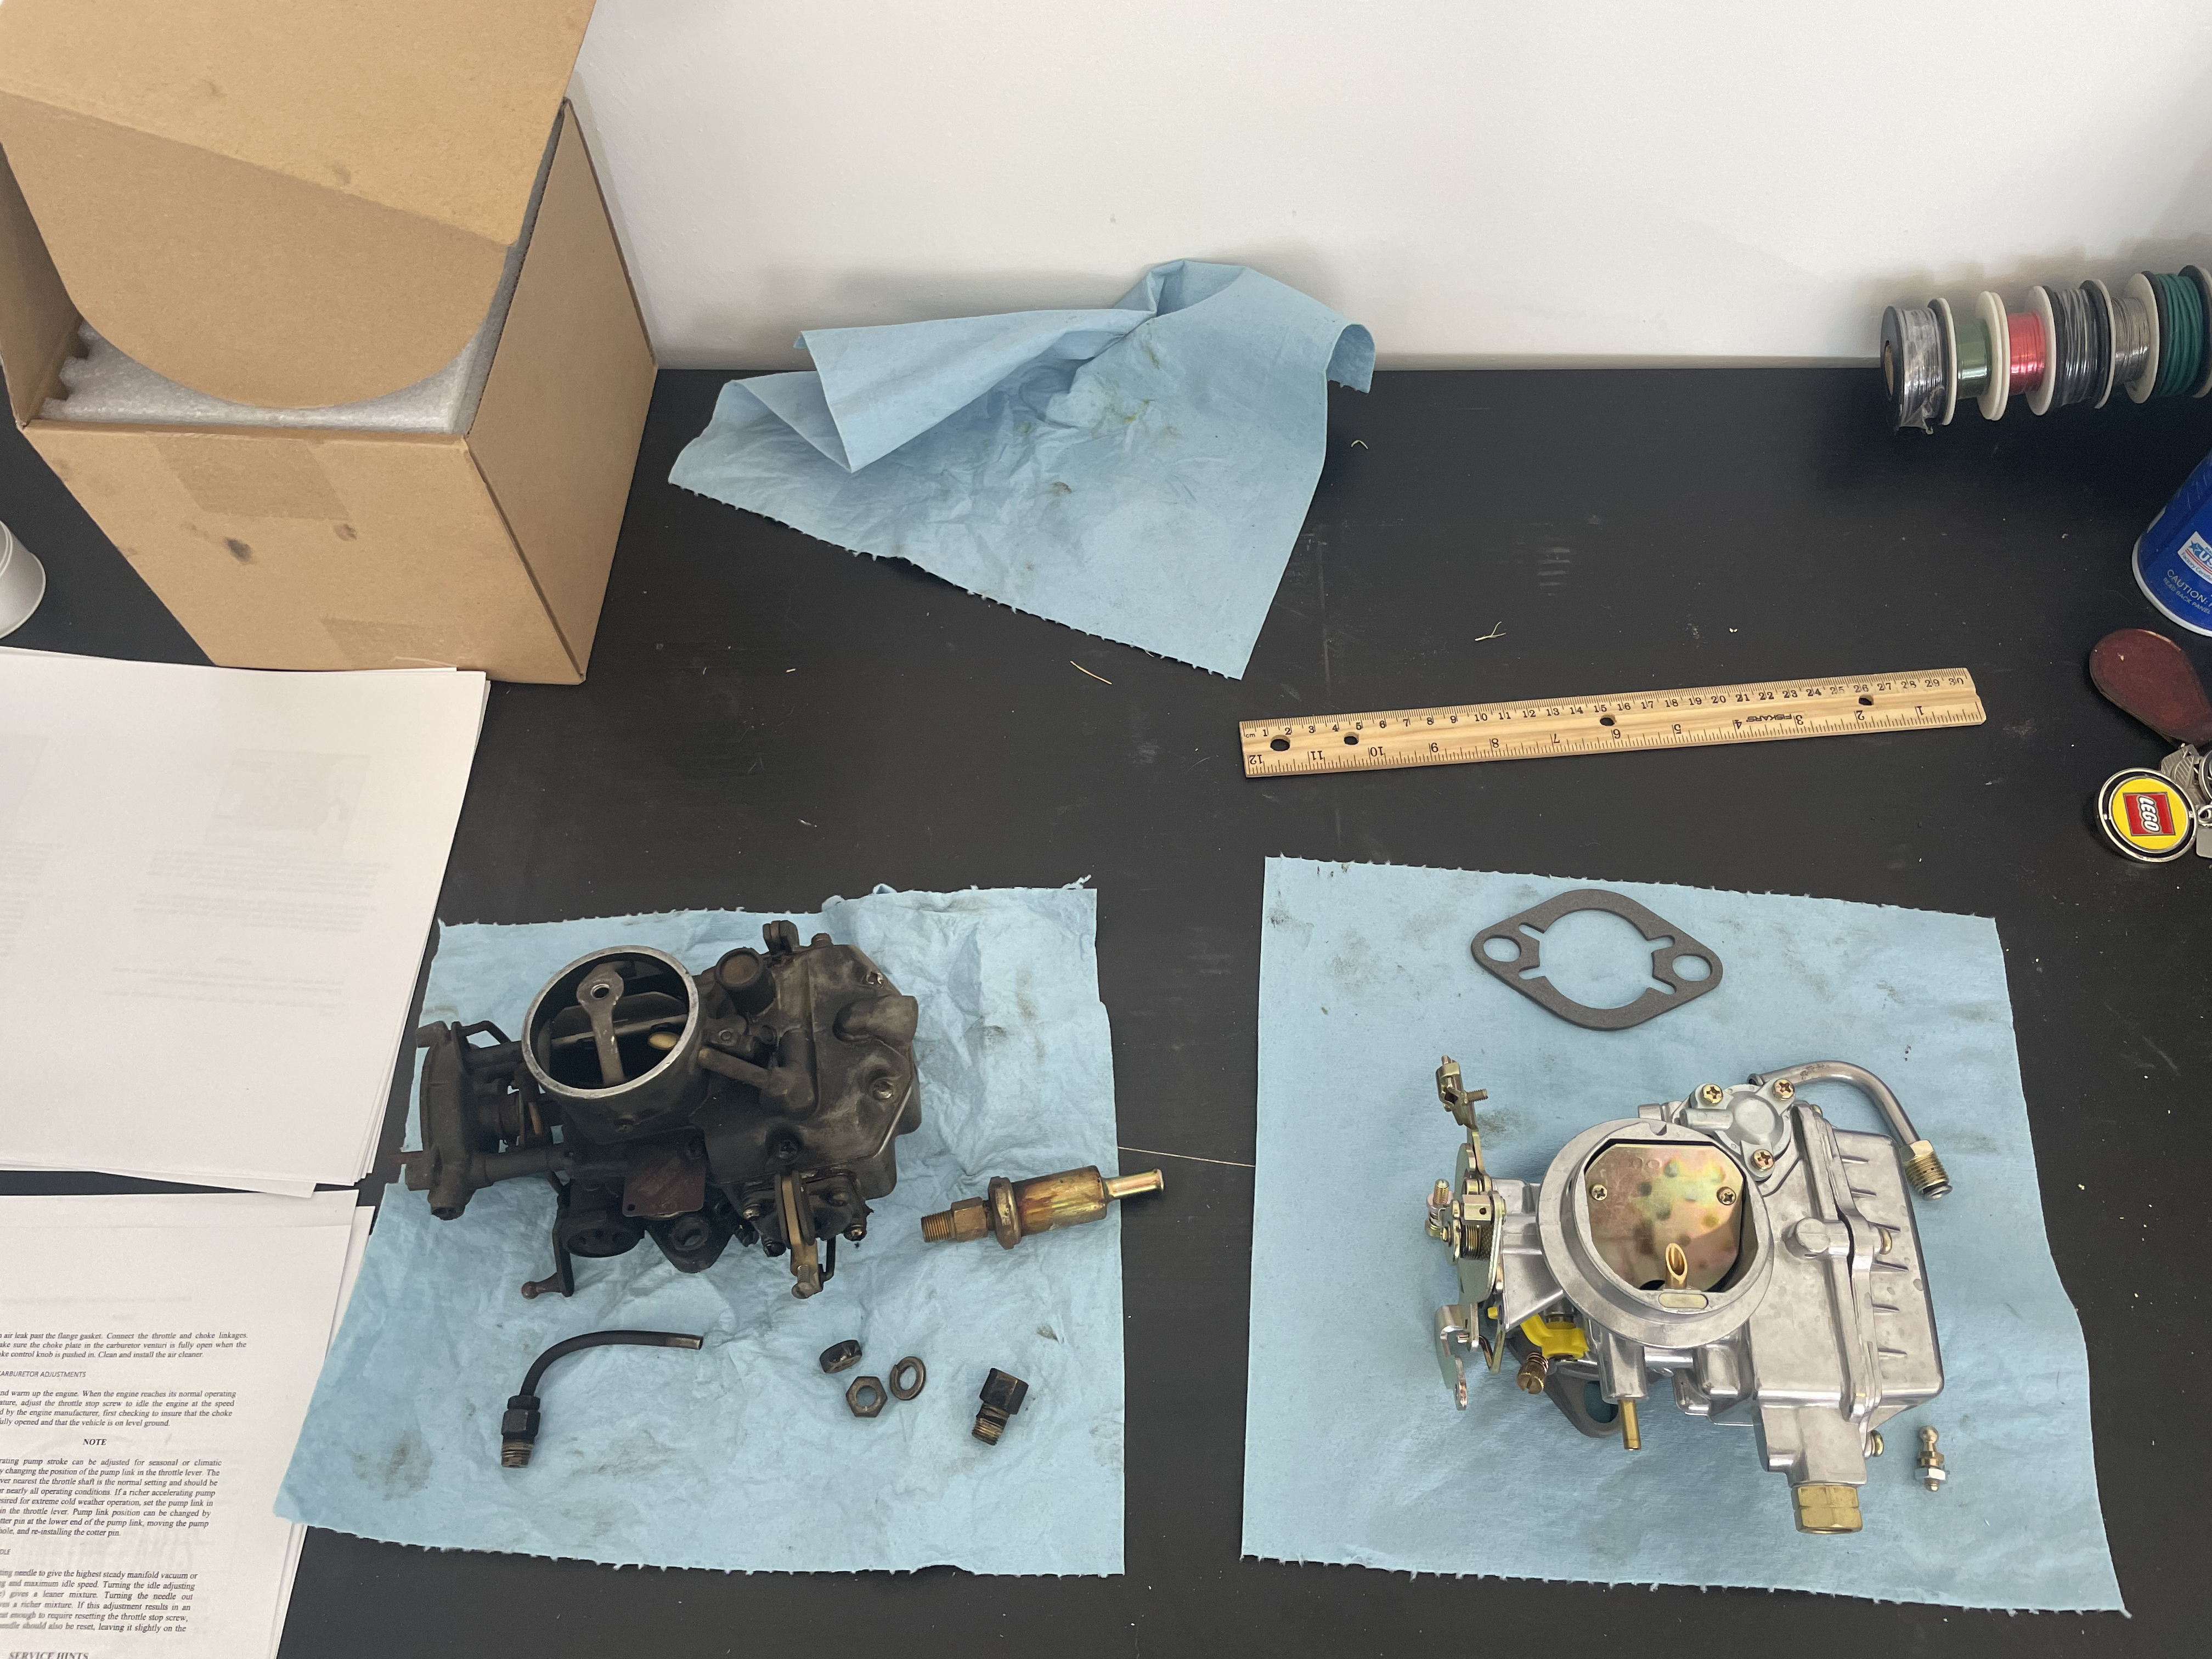
Both the Autolite 1100 and the Holley 1904 have a bolt pattern that allows them the directly mount to the engine intake. The intake inlet is roughly the same size, and the studs coming off of the intake fit nicely into both carbs.
In the below side-by-side comparison, you can see the size similarity.
Another primary difference that I’m excited for is the introduction of a manual choke. Between the two Autolite’s I’ve had, the automatic chokes have always broken within months of installation. Given that Texas is perpetually hot, I’ll likely never really need the choke, but I’ll be installing a manual choke cable regardless to hold it open.
The old automatic choke operated by means of a bi-metallic spring that was located in a half plastic, half metal housing. Over time, the heat of the engine bay would make the plastic brittle and it would inevitably become detached, with the bimetallic spring to follow shortly after.
The new manual choke cable is easily attached to the carb using two small screws. Below is a preview of how it looks when installed.

Other notable changes that will need to be addressed are the locations of the fuel inlets, the method of attaching the throttle, and vacuum lines.
A final important note of comparison: The Holley 1904 was never a “stock” option for this engine. So when finding any parts for it, you can’t just put the make/model/year in and get the correct parts. The carb came on a lot of older GM and International Harvester vehicles, so you’ll likely end up on some non-ford forums at some point
Preparation
Before embarking on the project, I did what every engineer should do, and read the manual. In this case, manualS (plural). Mike’s Carburetor Parts is an excellent resource, and has an entire page of carburetor manuals. I’ll be referring back to these manuals intermittently throughout the process here.
Components
Here was the rough shopping list that I started with, with links to the exact items purchased (spoiler alert: this wasn’t everything needed in the end):
- Holley 1904 carb
- Manual Choke cable
- PTFE Tape for fittings
- 3/8” Hose Barb right-angle brass fitting 1/2” NPT thread
In the end, only 2 of the original 4 pieces ended up in use. As it turns out Teflon/PTFE really isn’t great for fuel fittings, and my inability to read means that the brass fittings I ordered are totally incorrect.
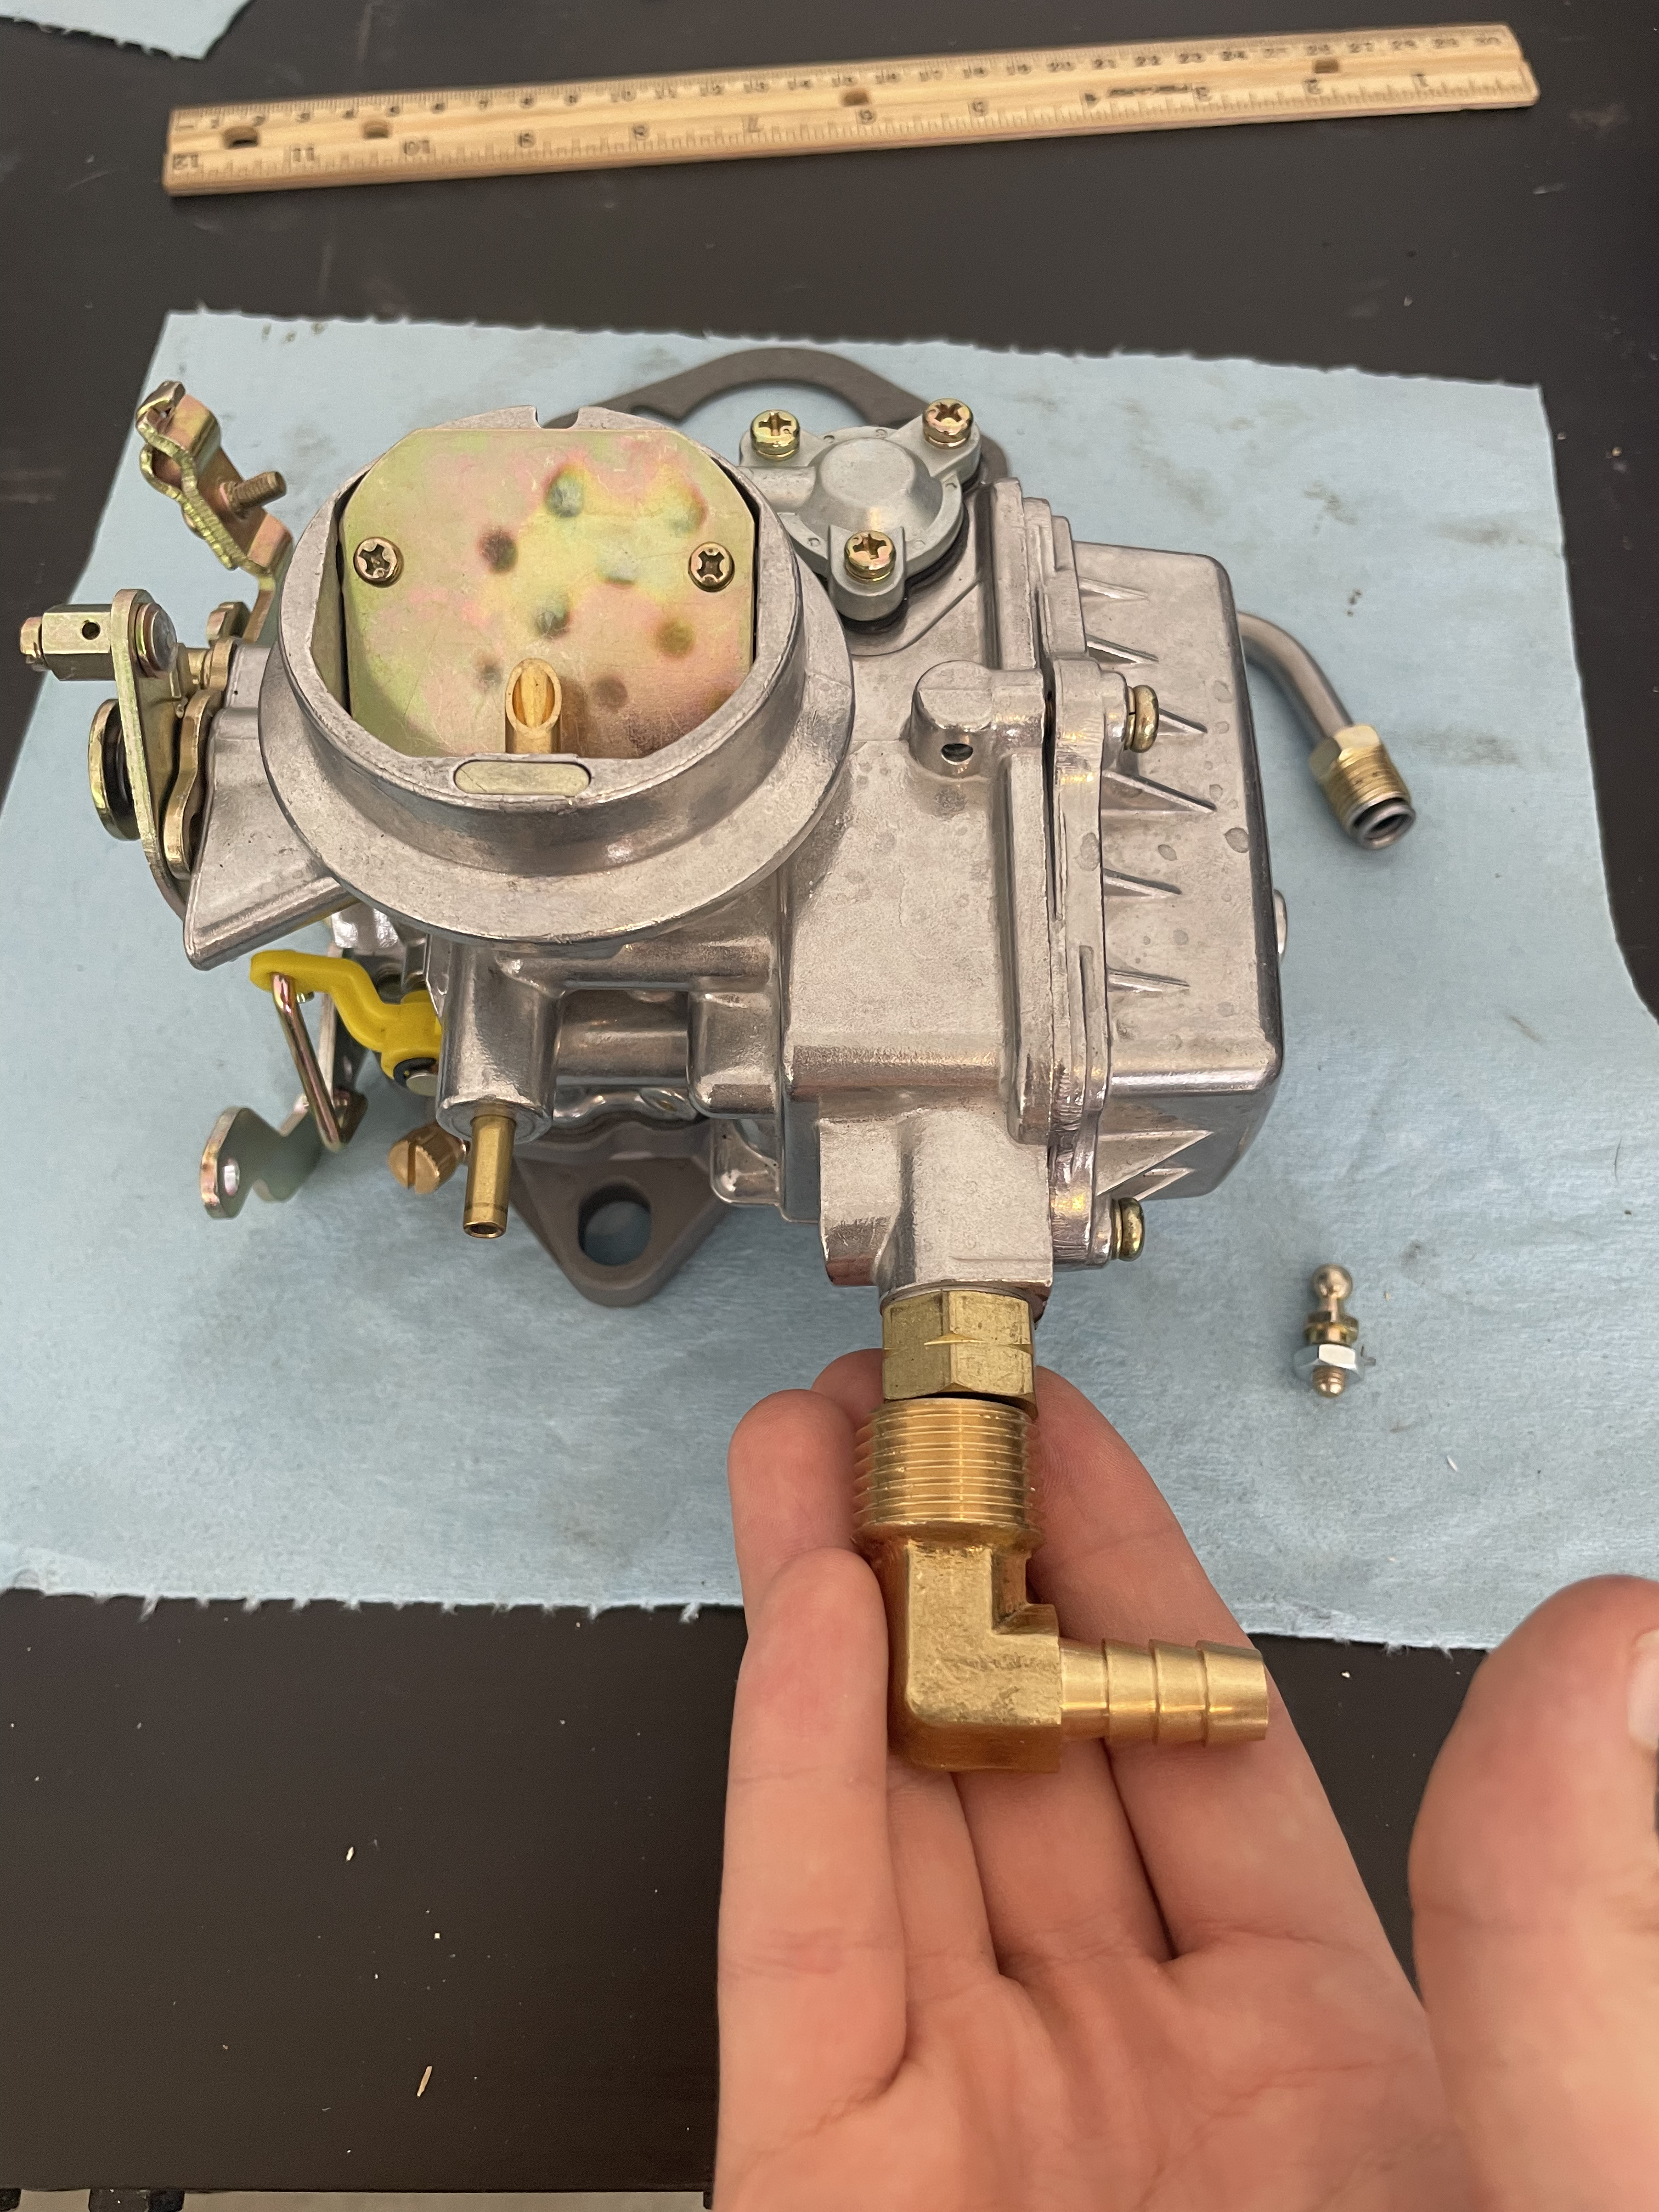
Back to browsing! I did try all my local hardware and autoparts stores first, and the experience was poor. General hardware stores didn’t have any flared fittings that were remotely the right size, and the autoparts stores were generally clueless. I think I could have eventually gotten the part from an O’Reilly’s or Autozone, but I guess I just did a poor job of explaining to them that the carb isn’t original and they can’t just look the parts up in the PC based on the year/make/model.
Eventually, I settled on this piece from Summit Racing. Similar parts were available via Amazon, albiet not Prime eligible so they would have taken significantly longer to arrive, with zero cost savings.
Additionally, I did not properly plan how to attach the Air Cleaner to the top of the carburetor. On the Autolite, you can see the little arch over the carb barrel, with a threaded hole. The air cleaner sits on that arch, and a bolt goes through the top of the cleaner and into the threaded hole to secure it. In theory, I could just rest the cleaner on the new carb, and hope it stays in place, but that would be a recipe for disaster. The chance of the cleaner falling off would be too high.
After some research, there is a bracket that looks to fit (haven’t received it yet, will include in Part 3). I briefly considered fabricating my own bracket (will maybe include the cad files and a tutorial in a later post) because I had trouble finding one in-stock and available for order. I’ll include a set of links below to a few different listings, in case anyone else is looking for one as well.
At the time of writing, IHPartsAmerica was the only site to have the part in-stock, so they got my business. They were also the most expensive of the 3, but given the availability I guess it makes sense.
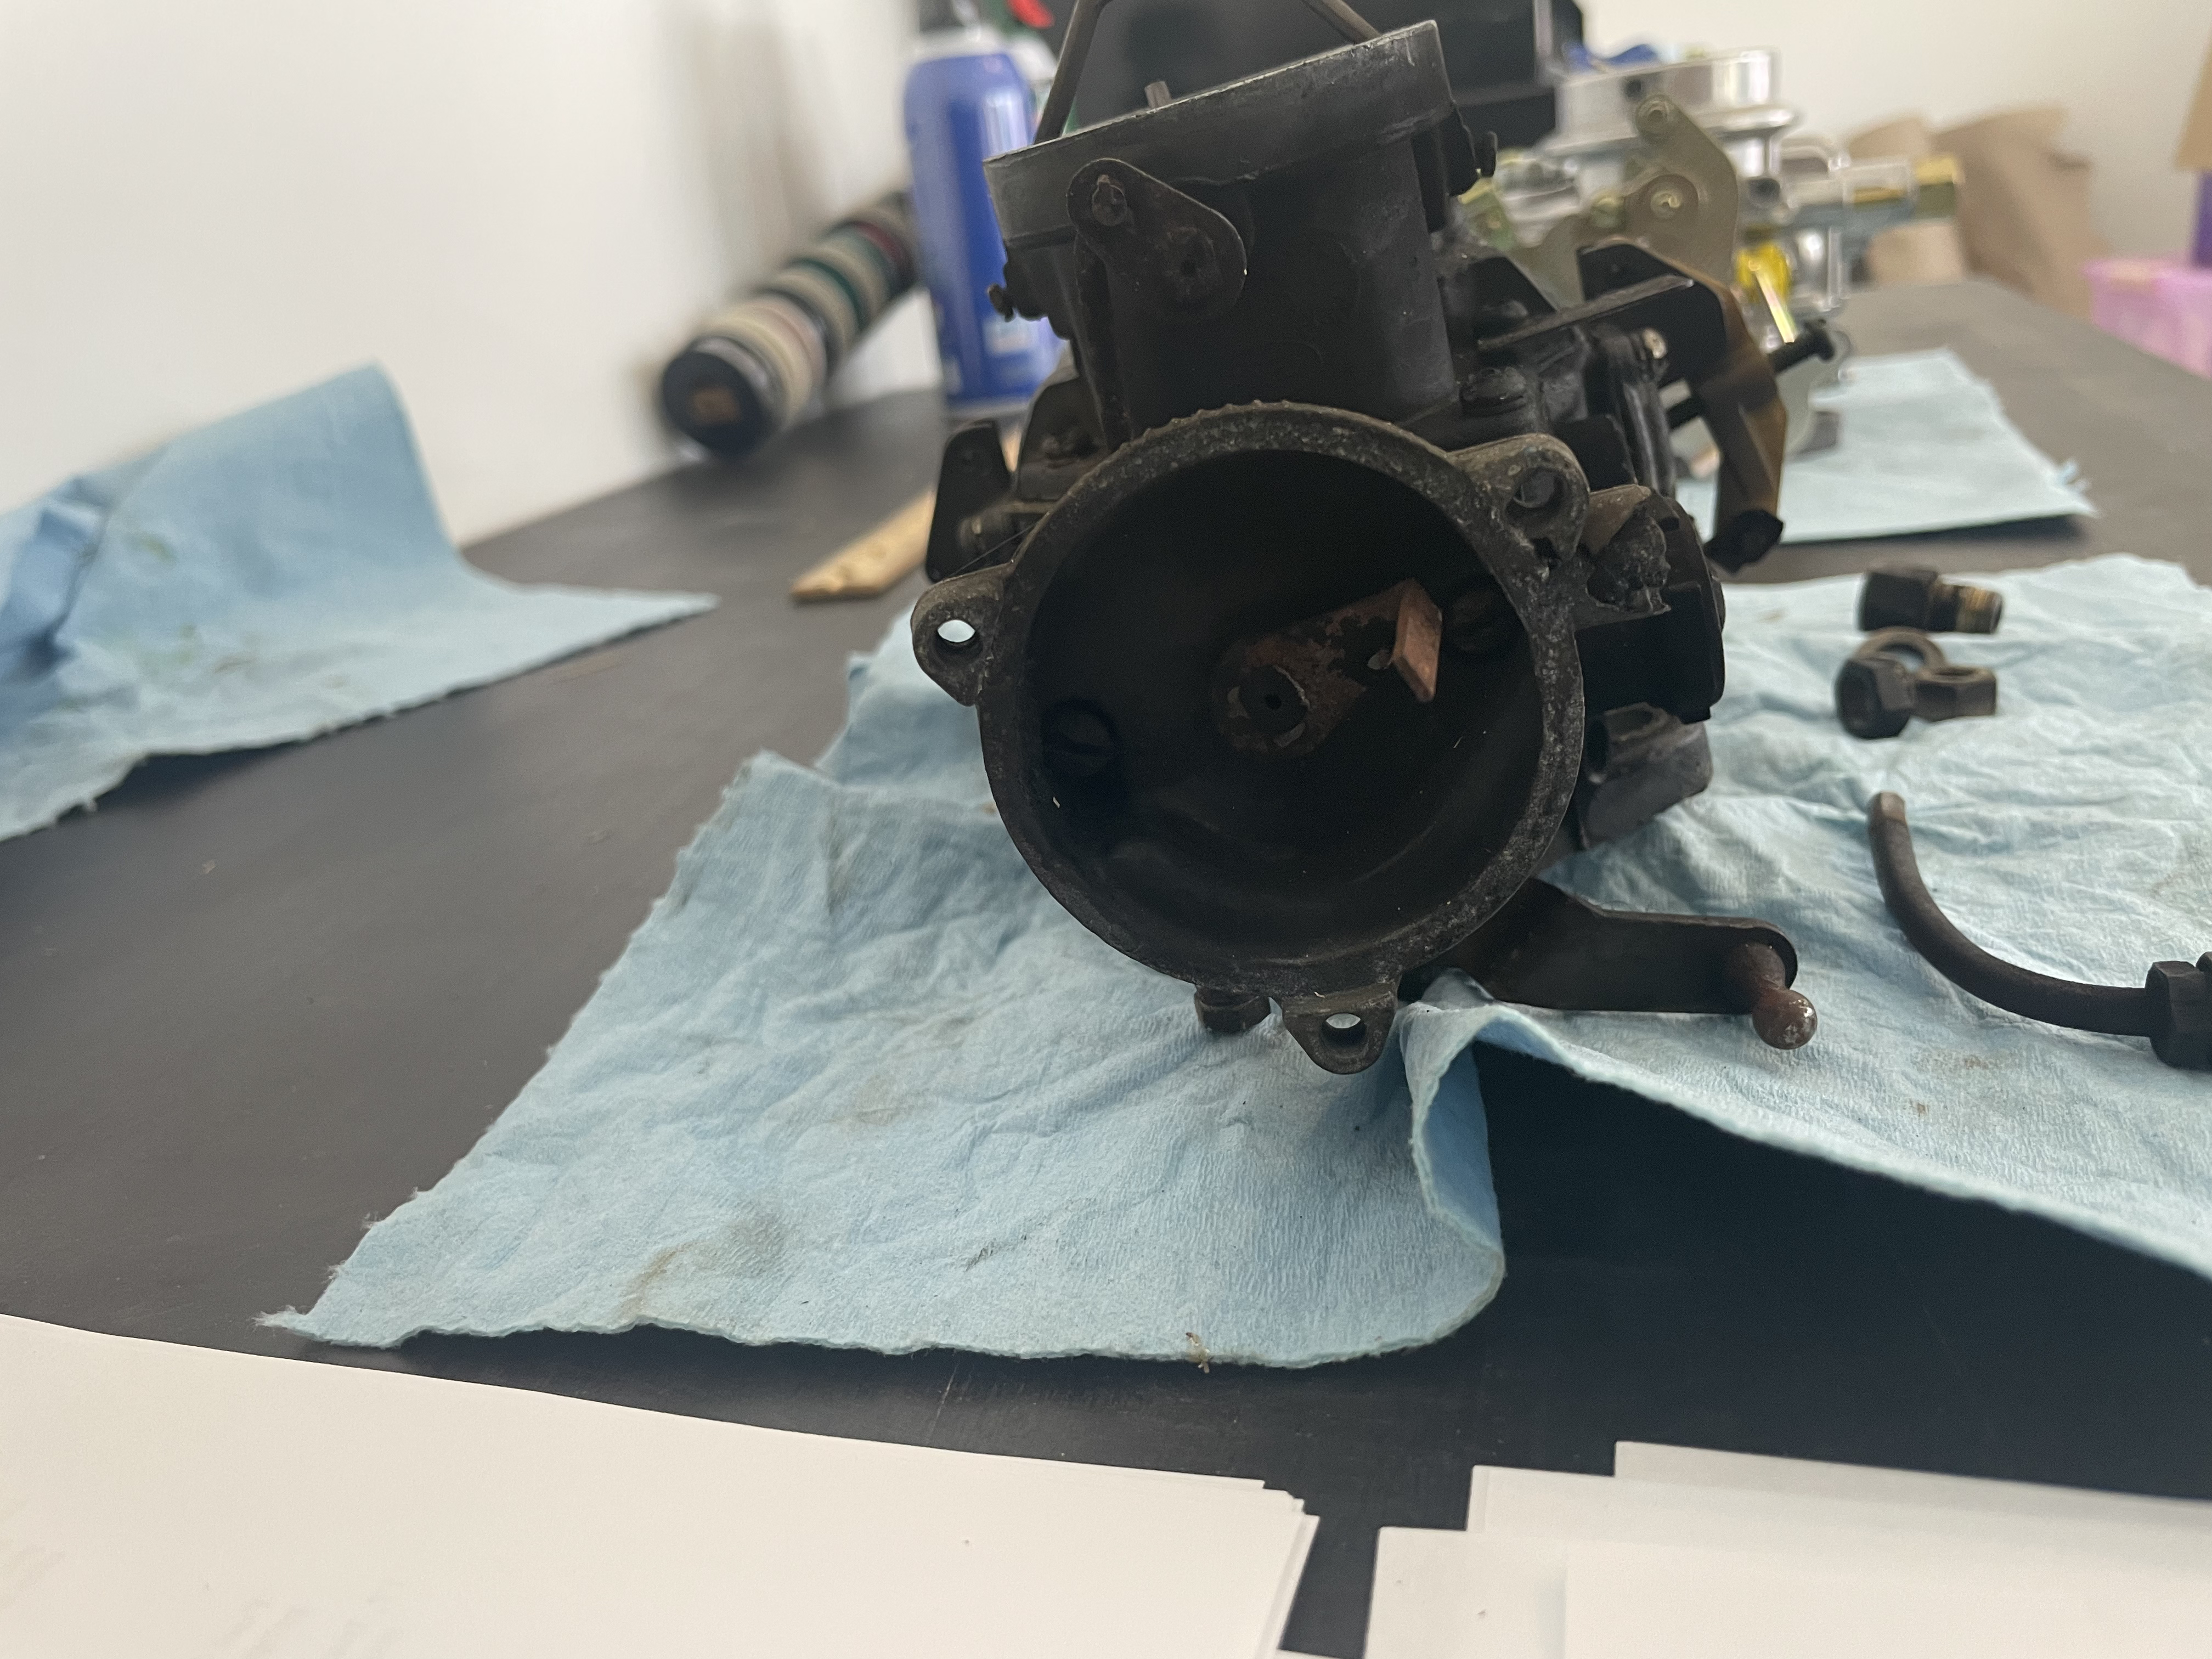
Finally, when attempting to “hook everything up” I found that there was no way to hook my existing throttle linkage to the carburetor. The old carb had an in-built throttle ball attached to the throttle lever (see bottom middle of below image).
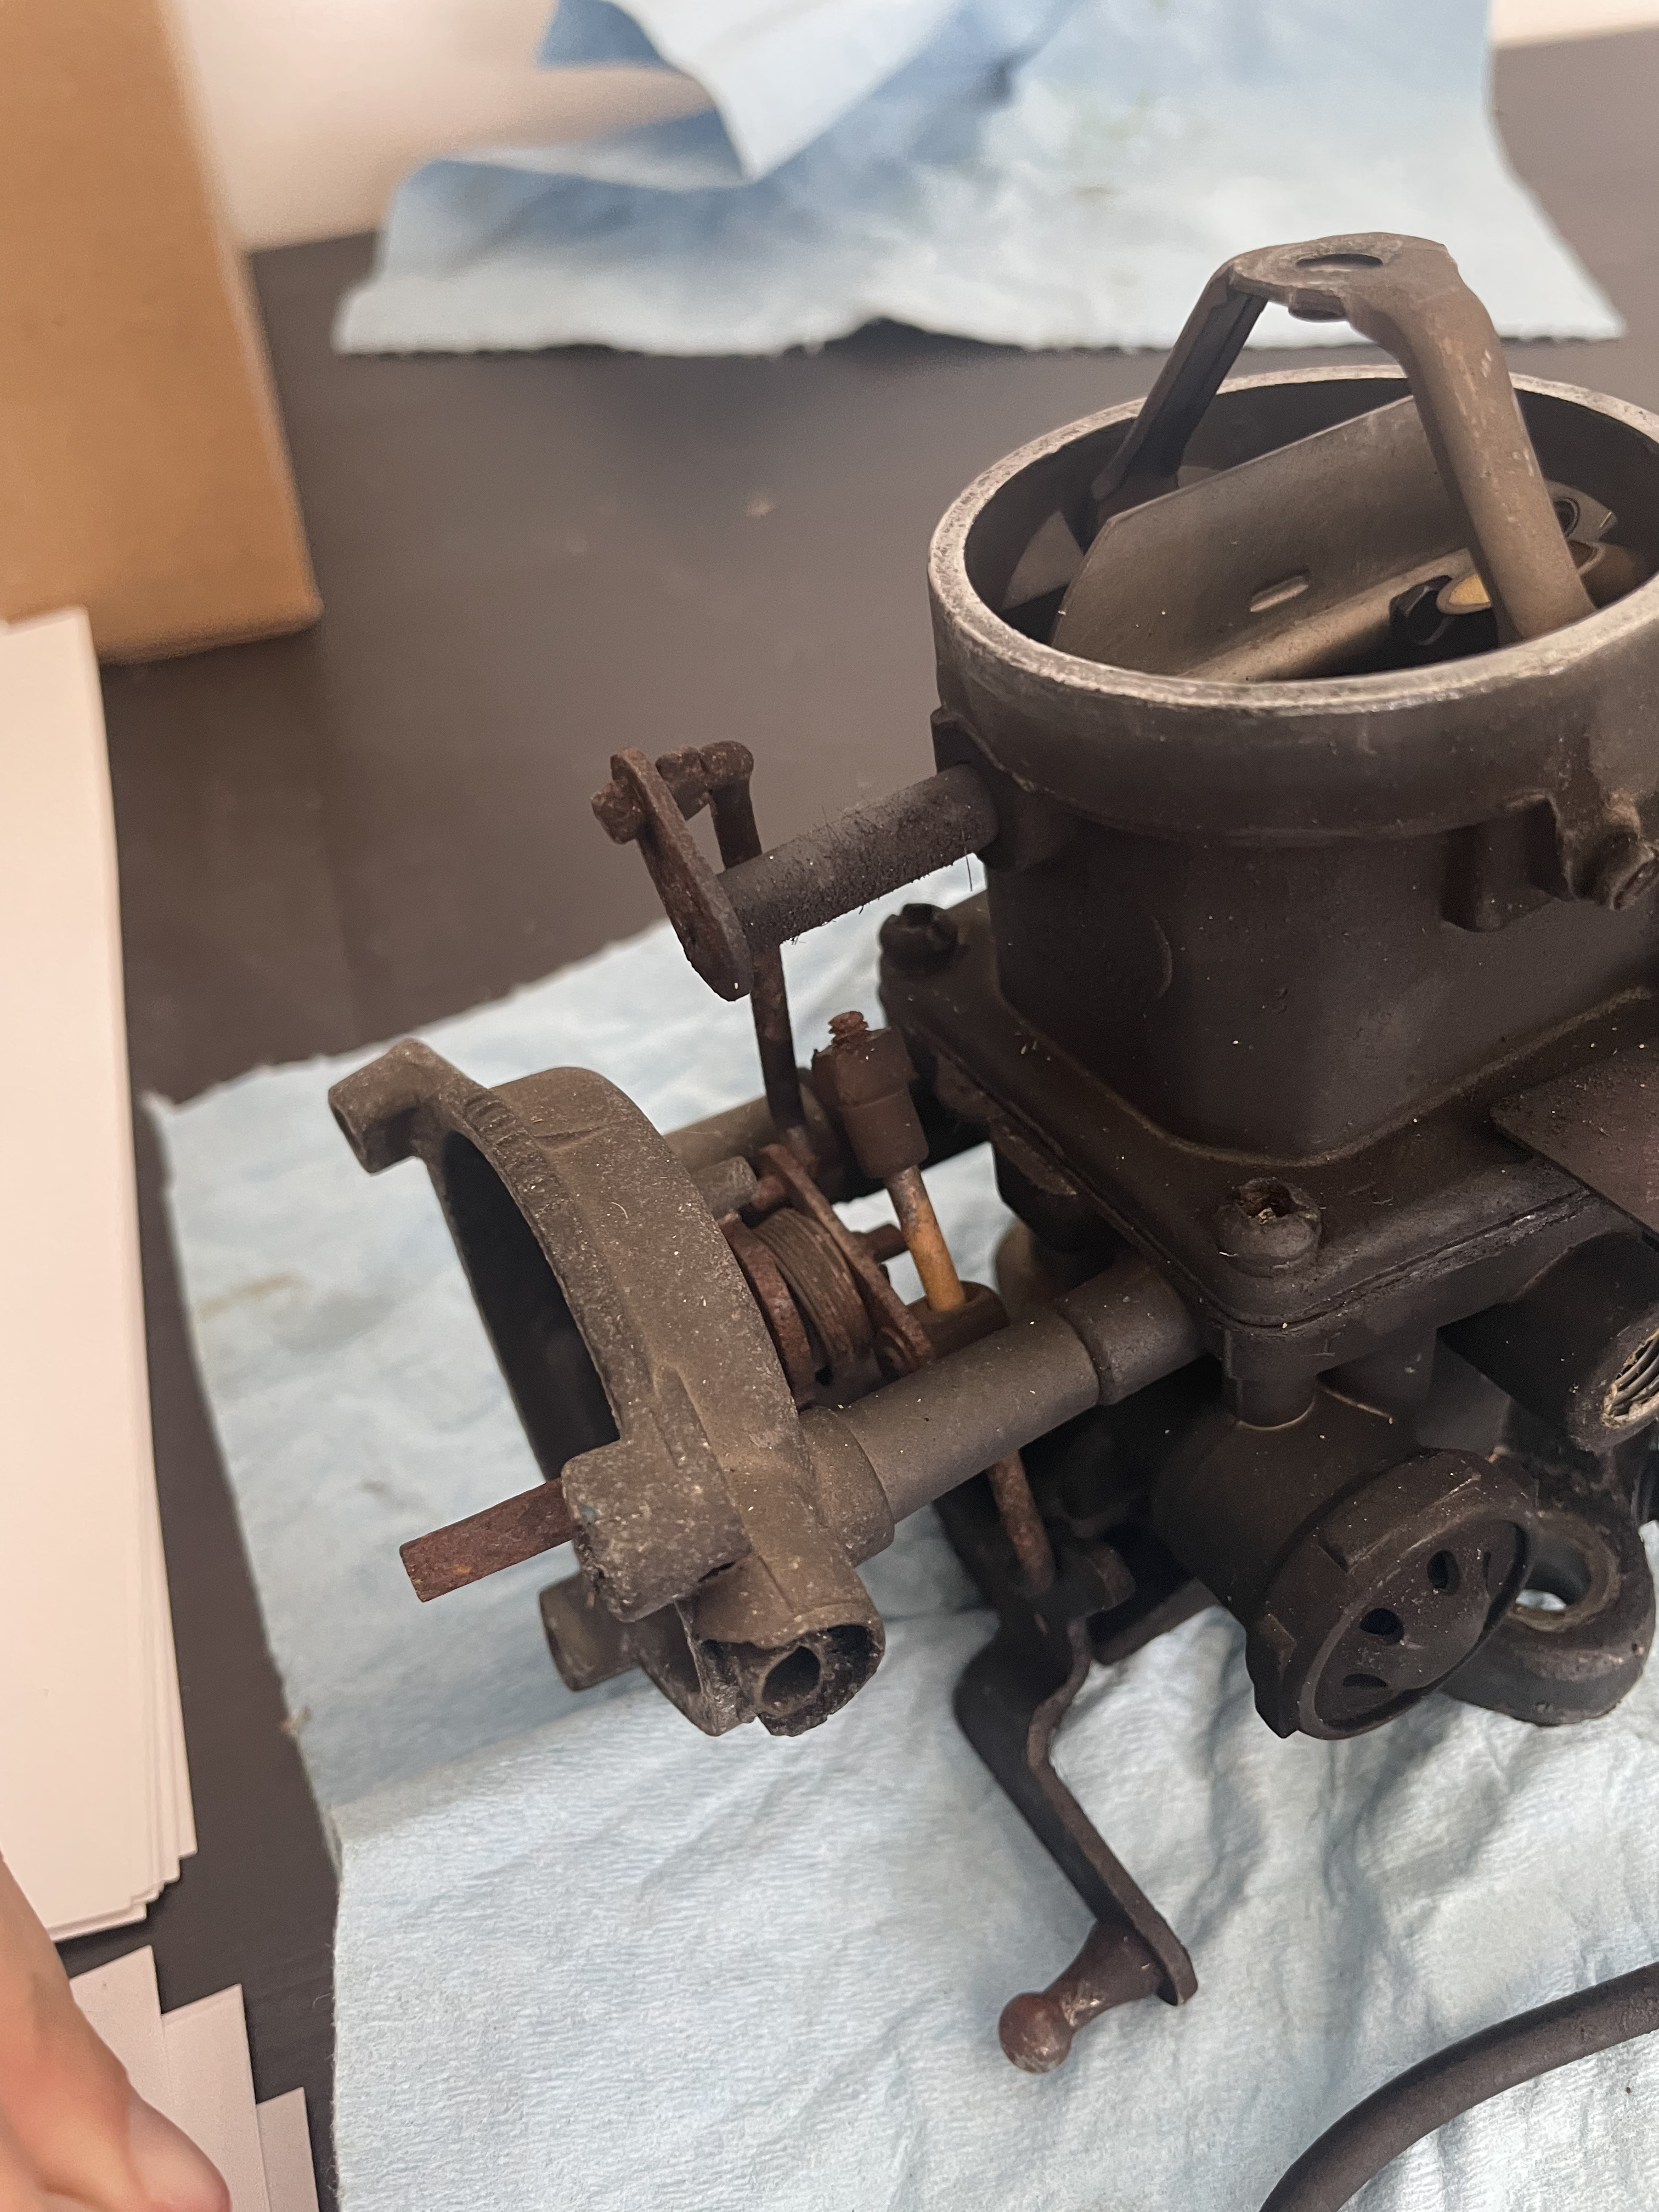
Compare this with the new carb, which just has a hole in the throttle lever.
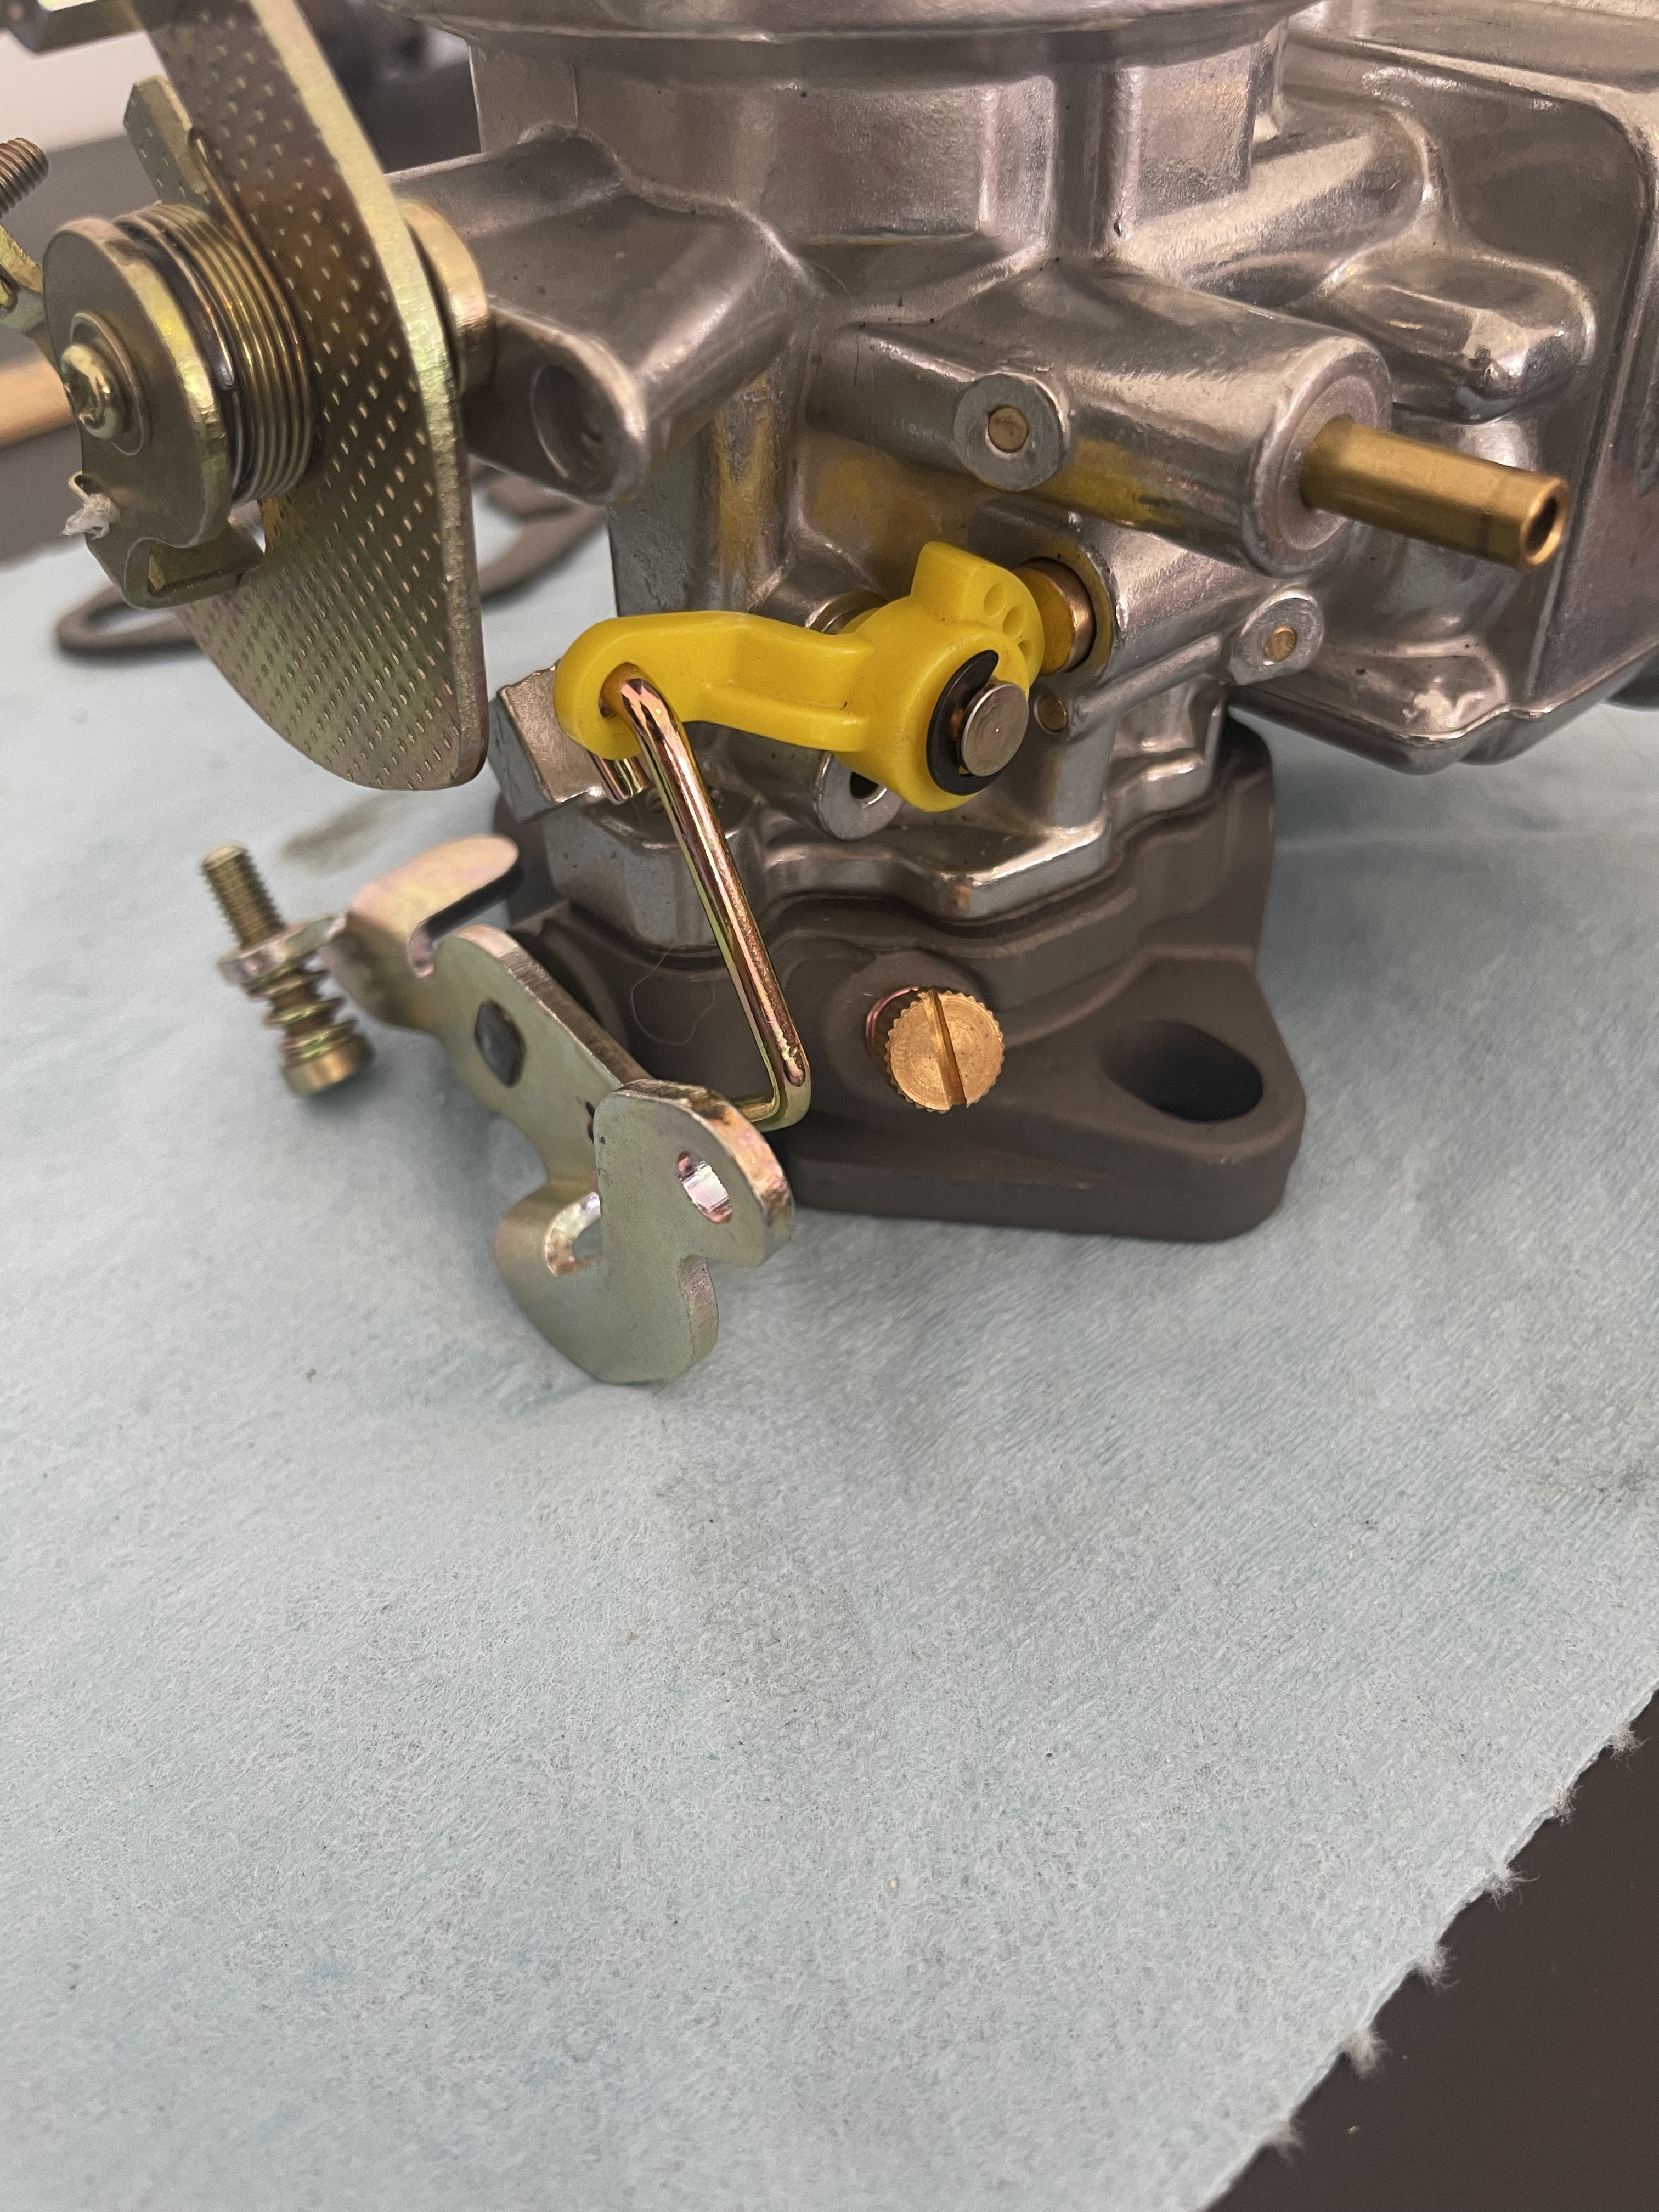
This was easily resolved with a set of these nifty throttle balls.
Final Parts list
This is the final list of parts ordered and used to get the carburetor properly installed and running on my engine. I will update this list further if needed.
- Holley 1904 carb
- Manual Choke cable
- Throttle balls
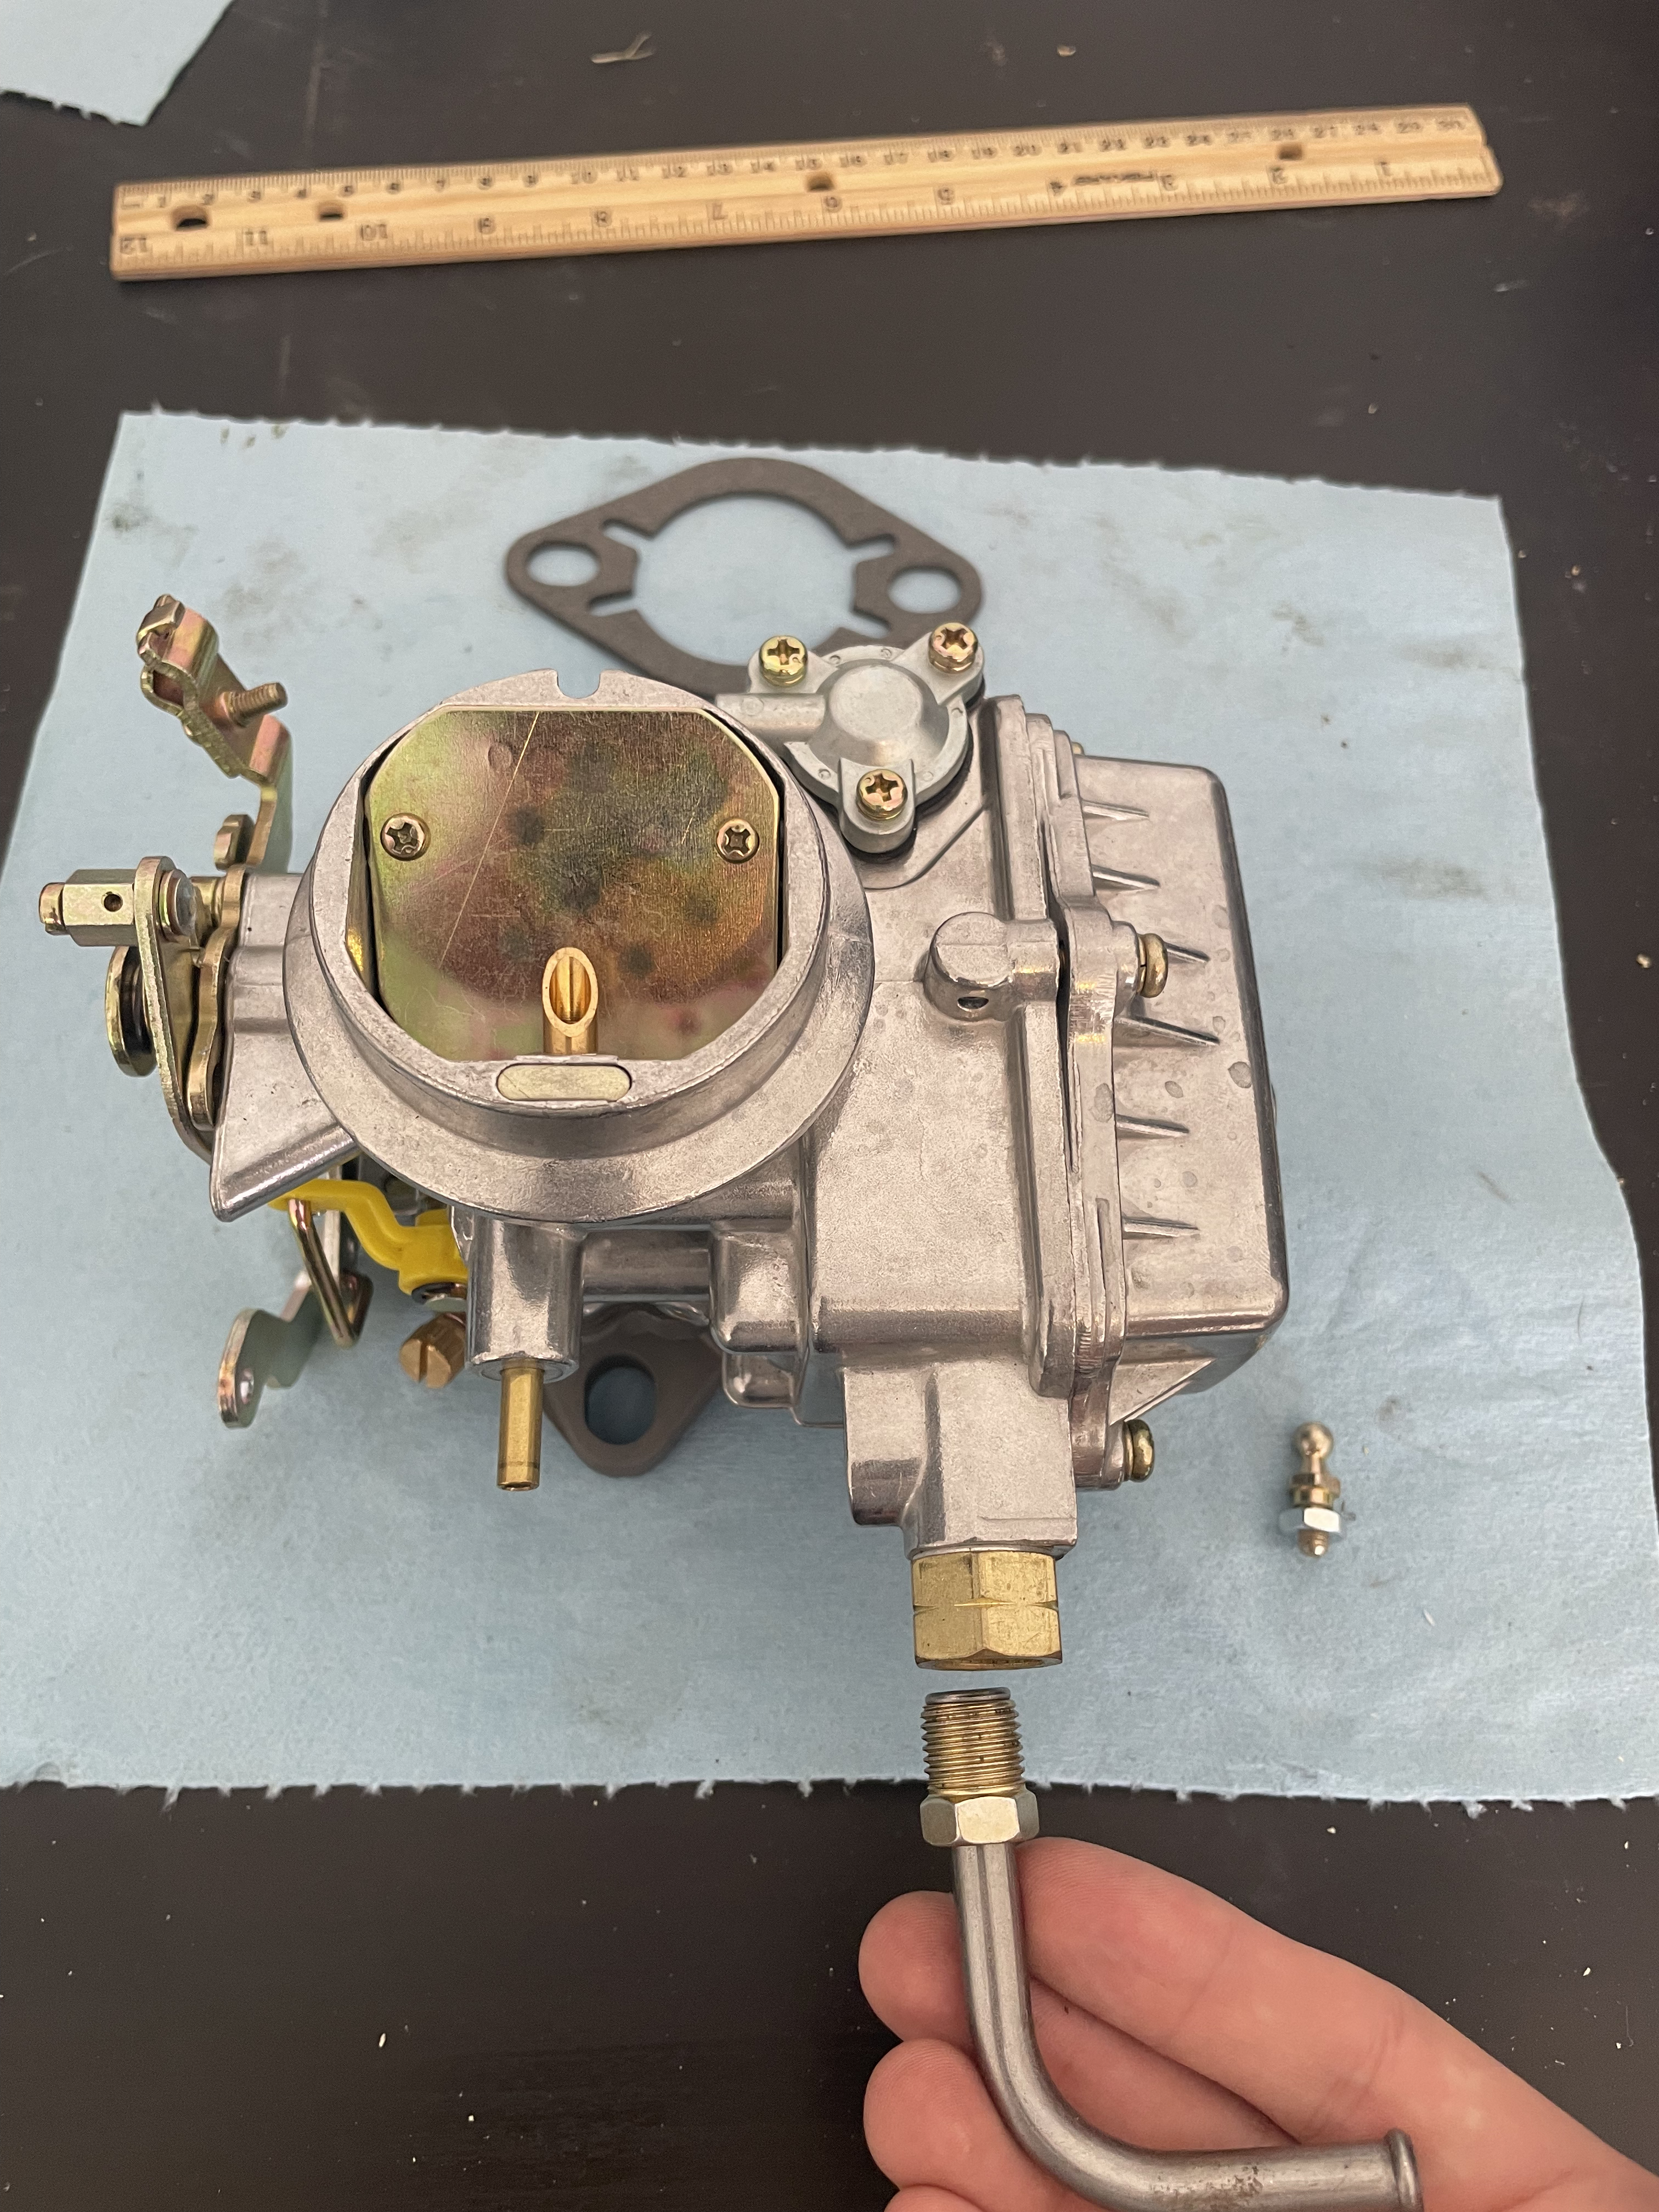
- Fuel inlet and hose barb
- Air Cleaner stud bracket
Final thoughts
These are mostly train-of-thought notes about the issues I faced getting the new carb installed and working on my vehicle. Your mileage may vary, and I am far from an expert on these topics. If you’ve got suggestions or corrections, I’d be happy to receive your feedback. My email and contacts are at the bottom of the page.
Other Posts
- Part 1
- Part 3??